Set up a Google service account
So that we can communicate with Google on your behalf you need to link a Google developer project and service account. These instructions will guide you to do that.
Step 1: Open a private browser or incognito window. This is to prevent any conflicts with other Google accounts you may have.
Step 2: Create a new project in Google Cloud Console.
Step 3: Go to the Google Play Developer API page and click Enable to enable to API.
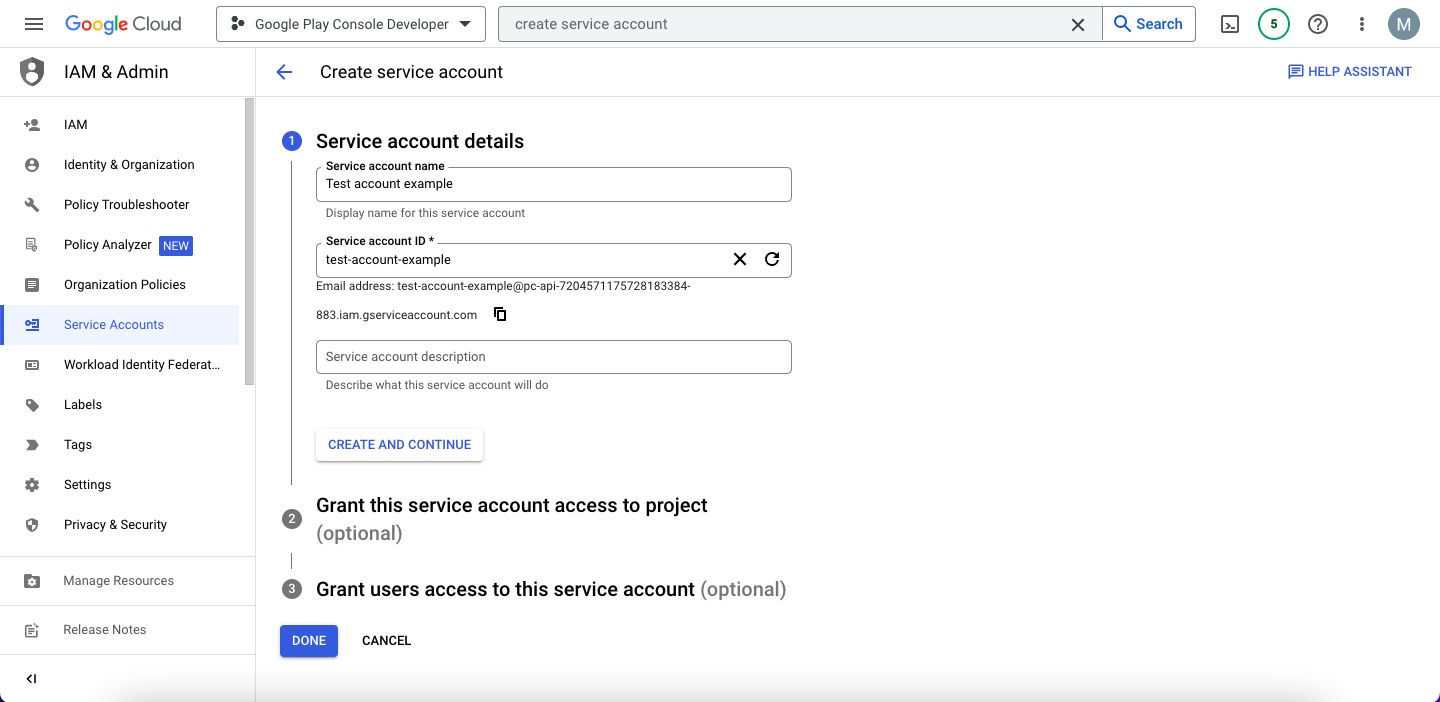
Step 4: Locate Service Accounts in the Google Cloud Console menu, then click + CREATE SERVICE ACCOUNT.

Step 5: Enter a service account name and description (optional). Click CREATE AND CONTINUE.
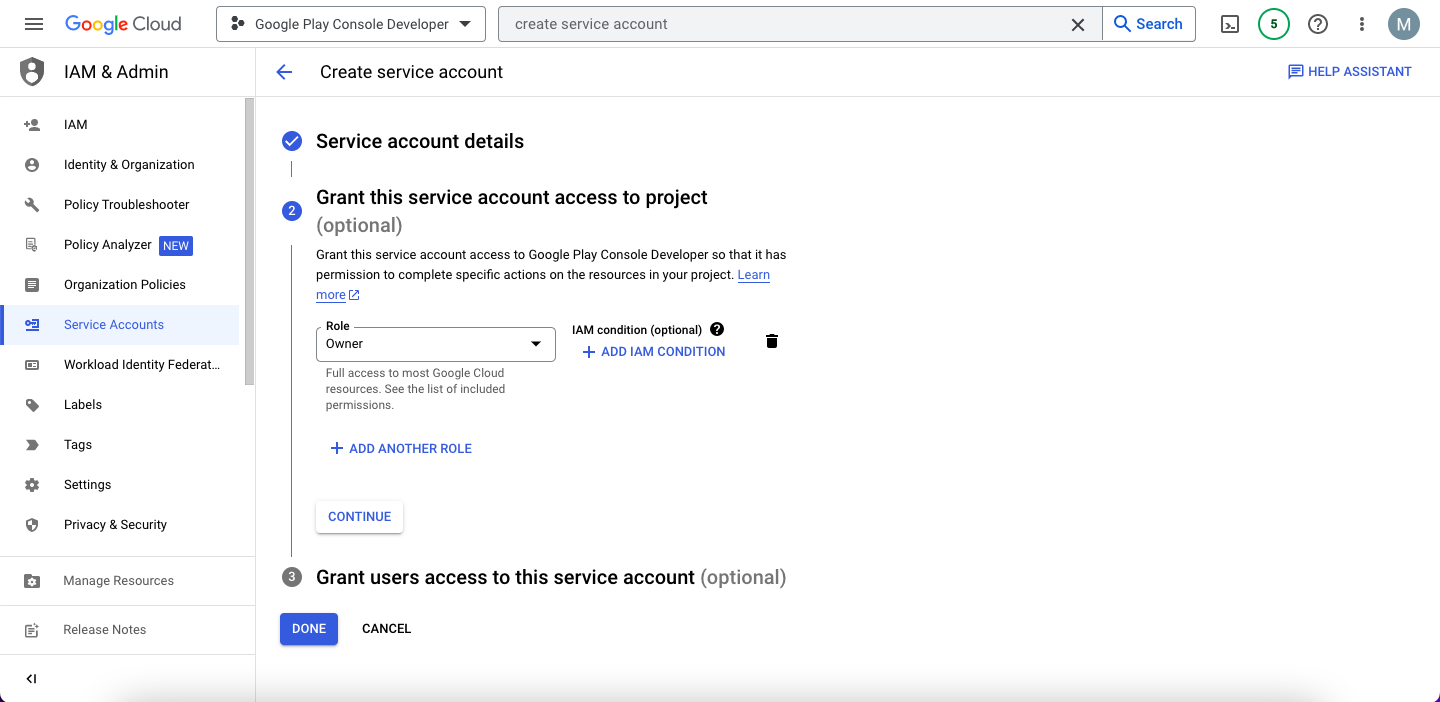
Step 5: Select the Role as Project > Owner. Click CONTINUE, then DONE.
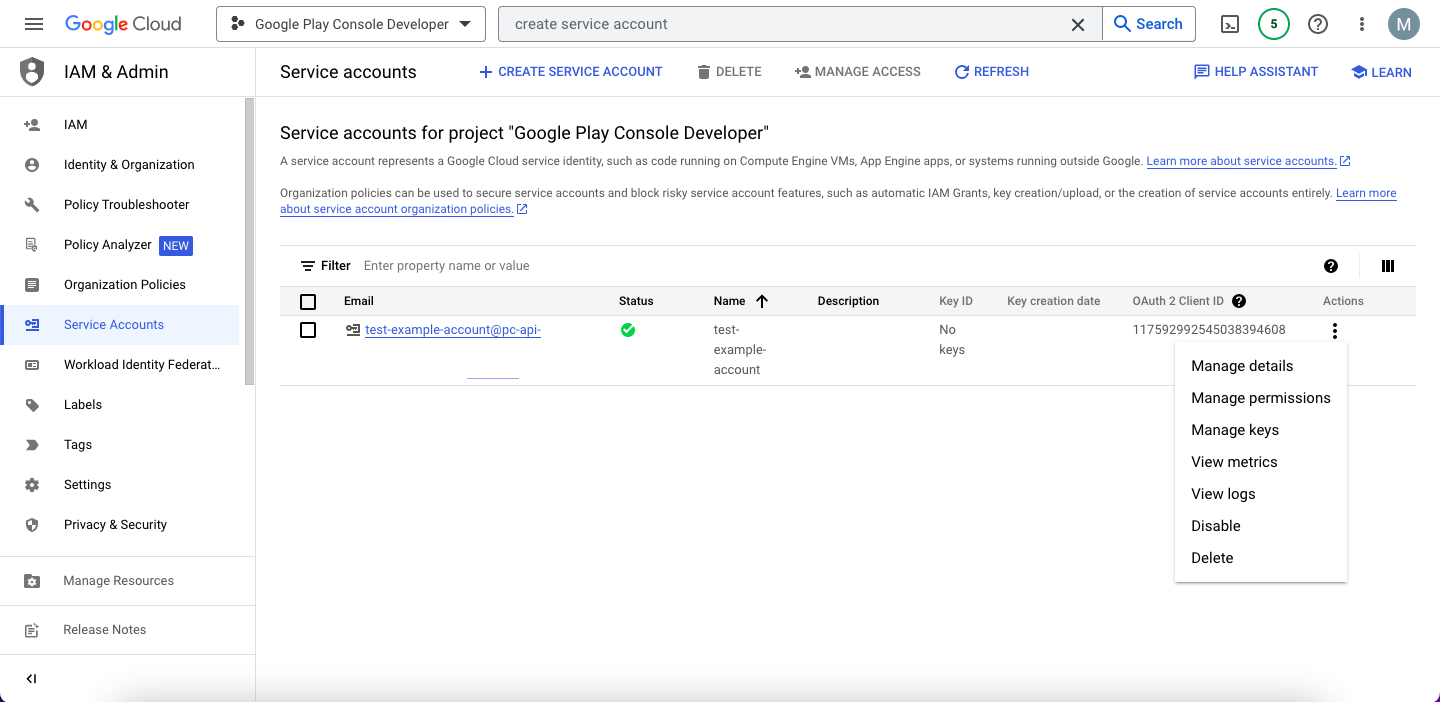
Step 6: Click the Action buttons on the service account you have just created, then Manage keys.
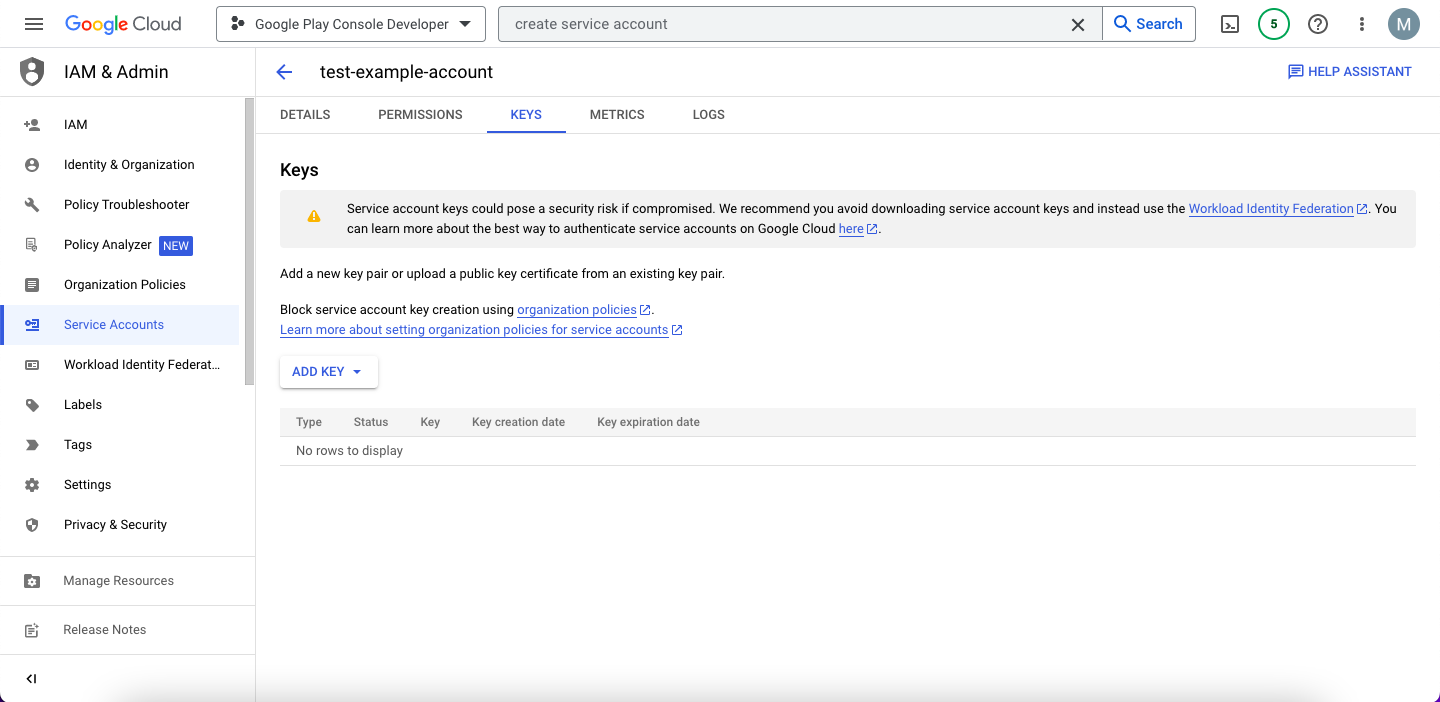
Step 7: On the Keys screen, click Add Key > Create Key > JSON, then Create to finish. This will download a file to your computer. Email the file to support@mealproapp.com.
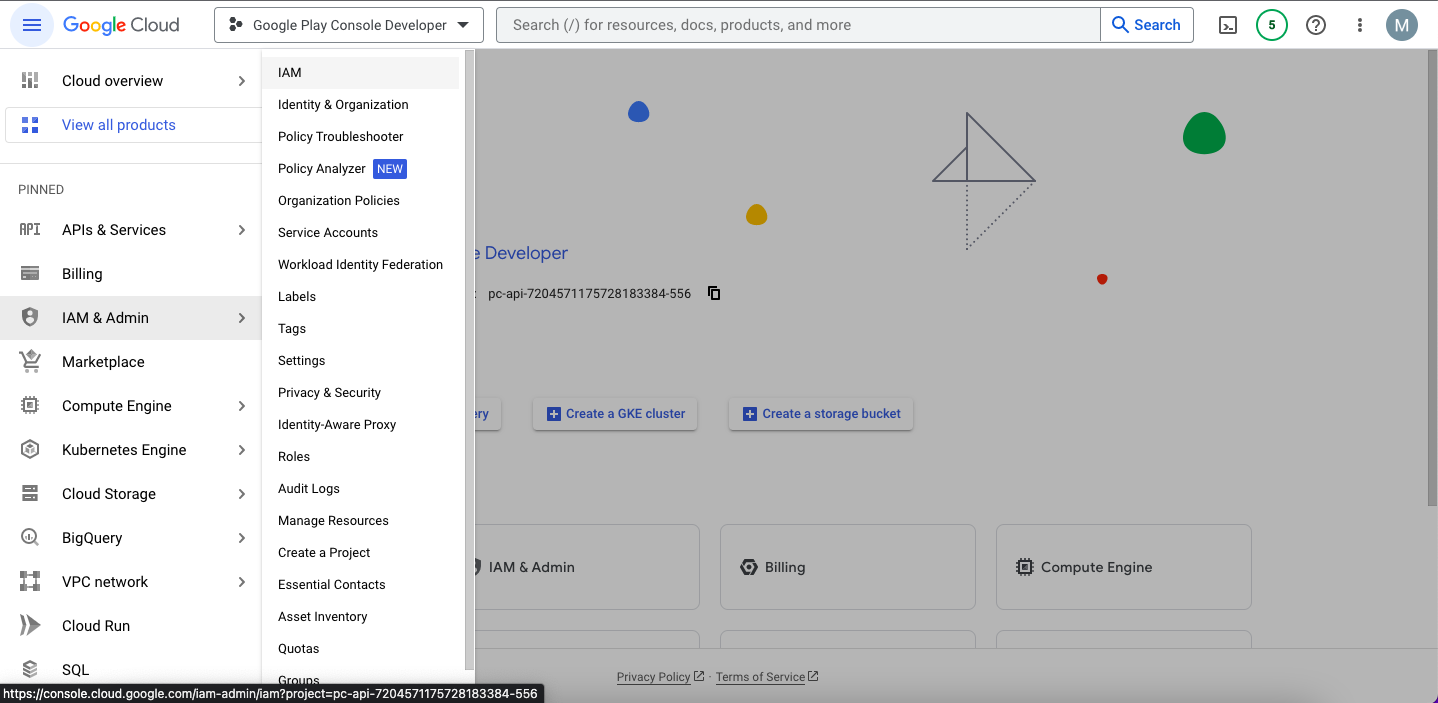
Step 8: Next, you need to add support@mealproapp.com as an owner for this project only (this can be remove later). In the menu, navigate to IAM & Admin, then select IAM.
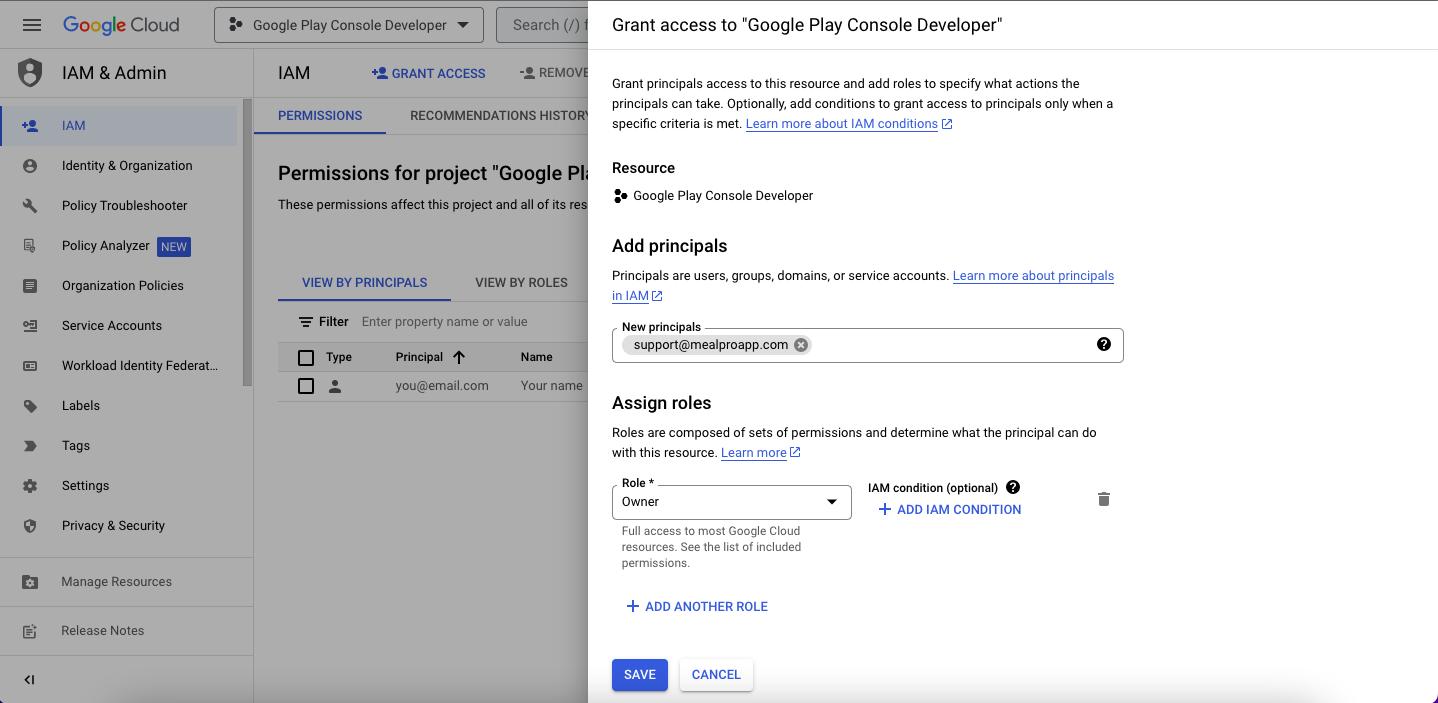
Step 9: Click GRANT ACCESS. Add support@mealproapp.com as a New principal, set the Role to Owner, and save.
Step 10: Go to Google Play Console. Select Users and permissions then Invite new users. For the email address, enter the Service Account email address that was created in step 6 (find this on the IAM permissions page in Google Cloud Console).
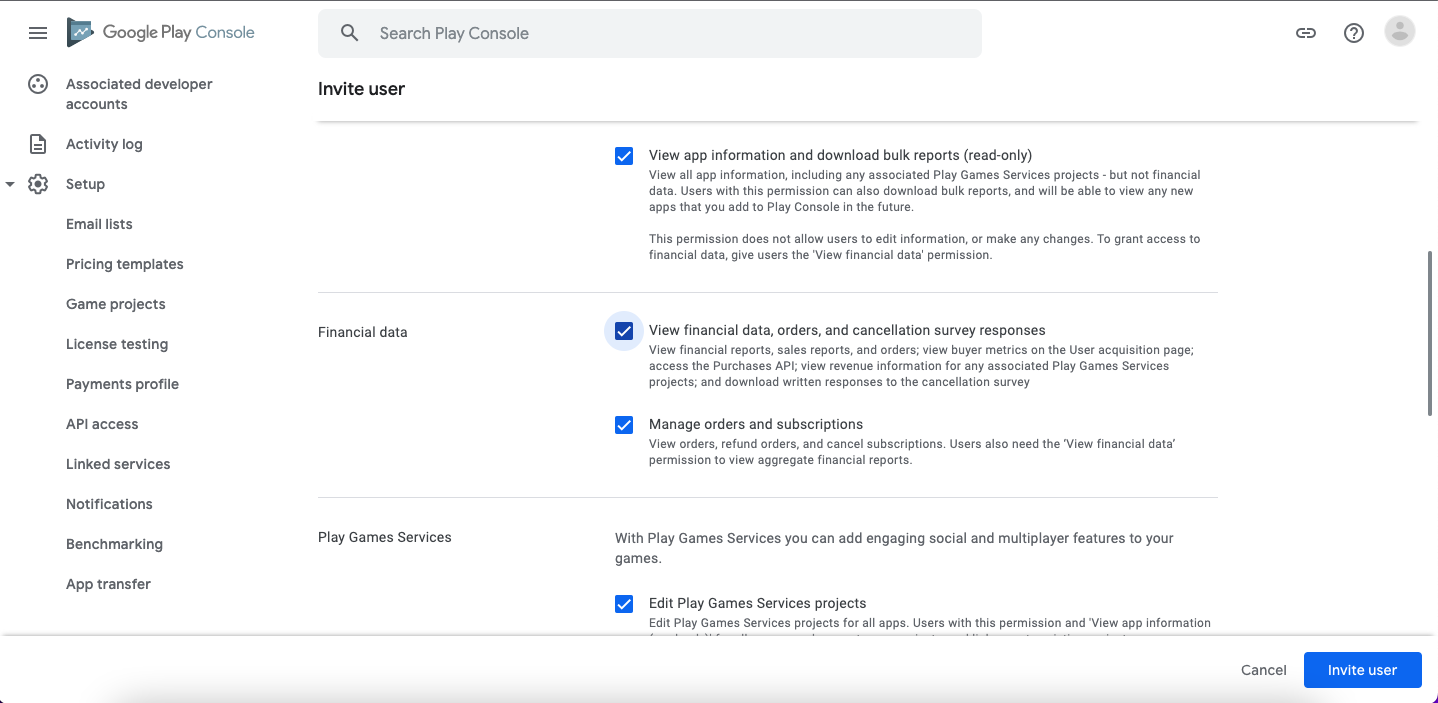
Step 11: Under Account permissions, go to Financial data and check the "View financial data..." and "Manage orders and subscriptions" options. Then click Invite user to save.
Step 12: You're done. Please let us know you have completed all steps.